# Microsoft Sentinel

## Microsoft Sentinel

{% hint style="success" %}
Microsoft Sentinel is an SIEM integration. SIEM integrations are used to perform analysis of any SIEM generated alerts, and/or to use generated data as part of investigation analysis.

Note that this is different from Microsoft 365/Microsoft Defender.
{% endhint %}

The Dropzone platform integrates with the [Microsoft Sentinel](https://learn.microsoft.com/en-us/azure/sentinel/) security SIEM. Many customers ingest other alert sources into Microsoft Sentinel (e.g. IDPs) and integrate Dropzone into Microsoft Sentinel rather than the source systems.

### Integration Overview

To enable these integrations you will perform the following actions:

* Register a new application in Microsoft Entra Admin
* Locate your Client ID, Tenant ID, and create a Client Secret
* Assign necessary API permissions to the application
* Assign roles to the application in Microsoft Sentinel
* Locate your Workspace Name and Workspace ID

See the [Microsoft Integrations](/integrations/data/ms_data.md) page for instructions on how to register a new application, locate your Client ID and Tenant ID, and to create a Client Secret.

### Set Application Permissions

General instructions on how to assign API permissions to the application can be found in the [Microsoft Integrations](/integrations/data/ms_data.md) page.

Enabling MS Sentinel will require the following APIs and permissions:

| API             | Permissions               |
| --------------- | ------------------------- |
| Log Analytics   | `Data.Read`               |
| Microsoft Graph | `SecurityEvents.Read.All` |

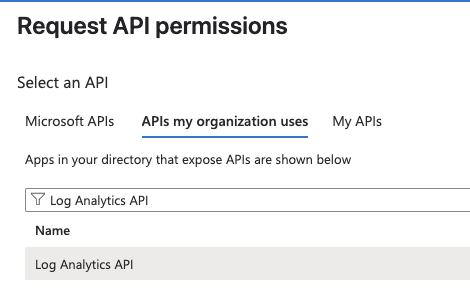
To add the Log Analytics API, do the following:

* In the API permissions page, click "Add a permission"
* Navigate to "APIs my organization uses"
* In the search bar, input "Log Analytics API," and select it

<figure><img src="/files/y0lNbvqOTCACuono7Rwu" alt=""><figcaption><p>Select Log Analytics API</p></figcaption></figure>

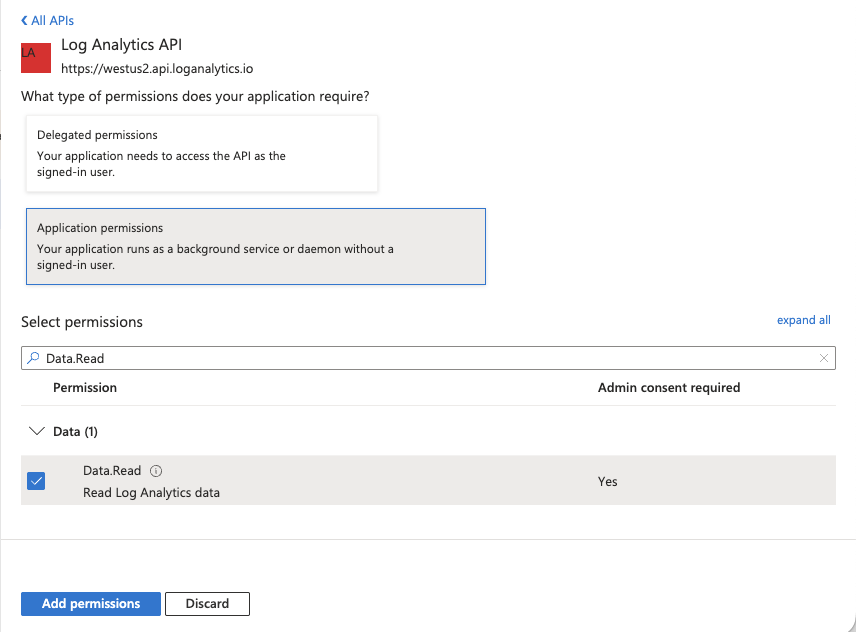
* Click "Application permissions"
* In the search bar, input "Data.Read" and select it. Click "Add permissions"

<figure><img src="/files/QLuZAWYsOXpDpFzQgfzO" alt=""><figcaption><p>Add the Data.Read permission</p></figcaption></figure>

* Once back in the Application API permissions page, click "Grant admin consent for \[mycompany.net]"

<figure><img src="/files/nKTcgGobOtW8J851R42c" alt=""><figcaption><p>Grant admin consent</p></figcaption></figure>

* Click "Yes"

<figure><img src="/files/6t1bTqpO5FLj1cjlgnEu" alt=""><figcaption><p>Grant admin consent</p></figcaption></figure>

If your integration requires access to security alerts via Microsoft Graph, do the following:

* In the API permissions page, click "Add a permission"
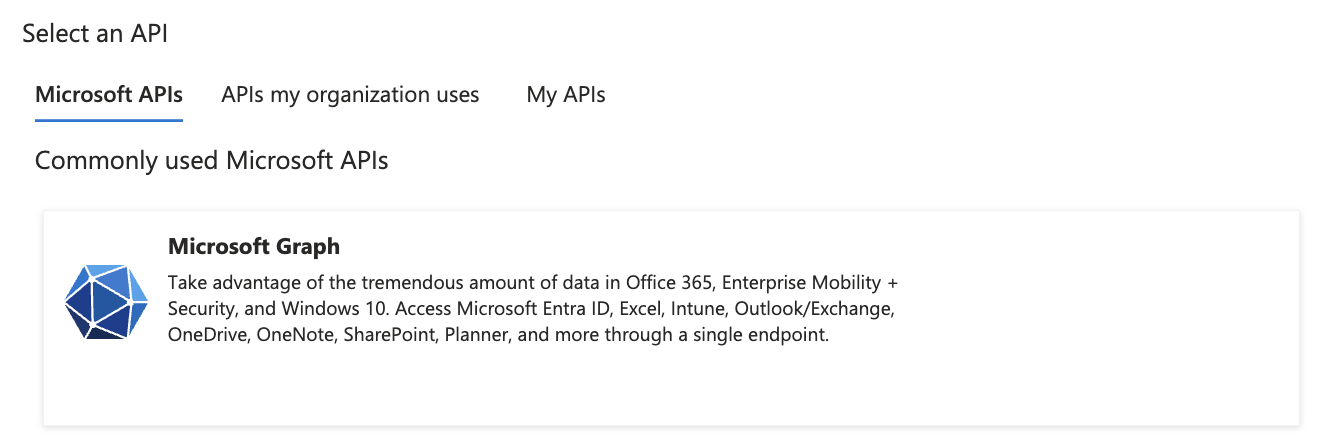
* Under the Microsoft API header, select "Microsoft Graph"

<figure><img src="/files/7ucvU7fOJt0pTZQNDMws" alt=""><figcaption><p>Select Microsoft Graph</p></figcaption></figure>

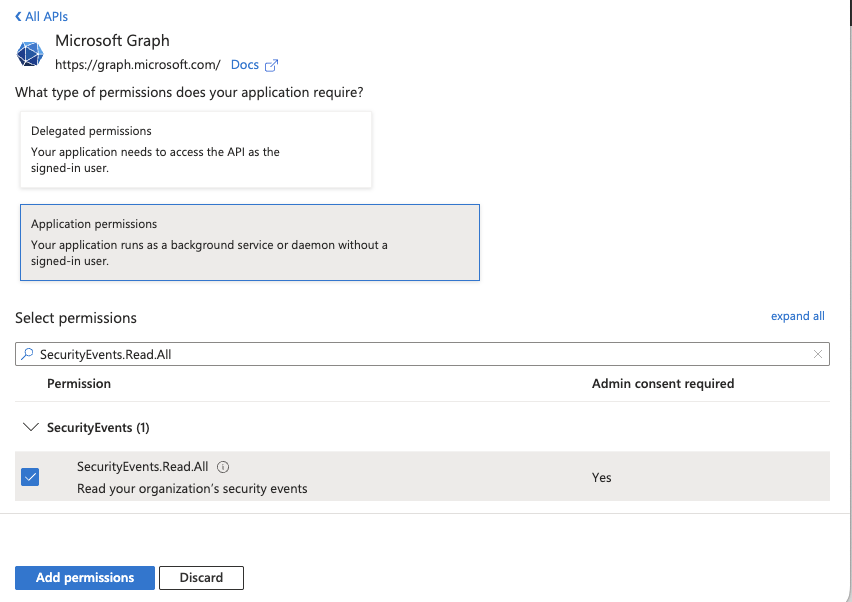
* Click "Application permissions"
* Check the permission "SecurityEvents.Read.All," then click "Add permissions"

<figure><img src="/files/jVxcXTcAFR4E5p05pFCS" alt=""><figcaption><p>Add the SecurityEvents.Read.All permission</p></figcaption></figure>

* Once back in the Application API permissions page, click "Grant admin consent for \[mycompany.net]"

<figure><img src="/files/nKTcgGobOtW8J851R42c" alt=""><figcaption><p>Grant admin consent</p></figcaption></figure>

* Click "Yes"

<figure><img src="/files/6t1bTqpO5FLj1cjlgnEu" alt=""><figcaption><p>Grant admin consent</p></figcaption></figure>

### Assign Roles in Microsoft Sentinel

To allow the application to access Microsoft Sentinel data, you must assign the application roles based on your desired access level.

* Navigate to [your Azure portal](https://portal.azure.com)
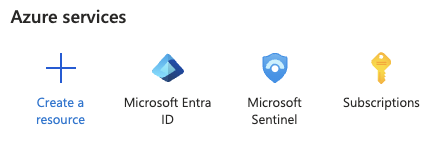
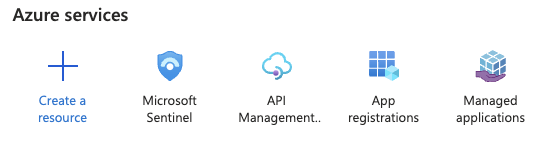
* Under the "Azure Services" heading, navigate to Microsoft Sentinel

<figure><img src="/files/KQBmhRjA7BMpTWzW7a1g" alt=""><figcaption><p>Navigate to Microsoft Sentinel</p></figcaption></figure>

* Select the Log Analytics Workspace you wish to analyze

<figure><img src="/files/CI94g8EcSk2jpupwdQYV" alt=""><figcaption><p>Select your workspace</p></figcaption></figure>

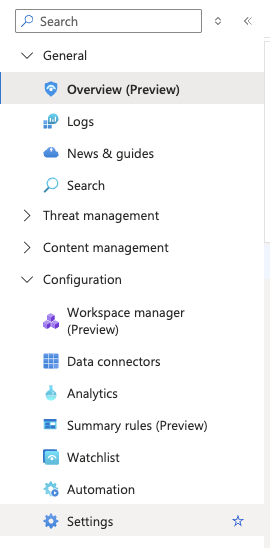
* Navigate to Configuration > Settings

<figure><img src="/files/rUuELoLWHKh310WXozqe" alt=""><figcaption><p>Navigate to Settings</p></figcaption></figure>

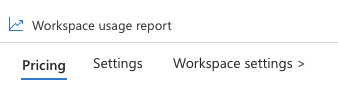
* Click on "Workspace settings"

<figure><img src="/files/s8i3MWmkqgG49GpHRbVD" alt=""><figcaption><p>Click on Workspace settings</p></figcaption></figure>

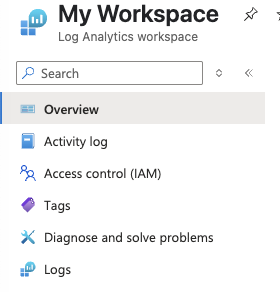
* Navigate to "Access control (IAM)"

<figure><img src="/files/2YPqtg5kekYZvCn2bRzg" alt=""><figcaption><p>Click on Access control (IAM)</p></figcaption></figure>

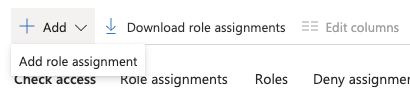
* Select Add > Add role assignment

<figure><img src="/files/ihAPqecFisIRxjncGWo8" alt=""><figcaption><p>Add a role assignment</p></figcaption></figure>

* Select a [role](https://learn.microsoft.com/en-us/azure/sentinel/roles) based on your desired access level:
  * Read-only access: Log Analytics Reader or Microsoft Sentinel Reader
  * Read and write access: Microsoft Sentinel Responder or Microsoft Sentinel Contributor

{% hint style="info" %}
If you wish to enable Ticket Sync, you must assign the application a Read and write access role.
{% endhint %}

<figure><img src="/files/9kQV6HNPCiYEW8V95rOX" alt=""><figcaption><p>Select your role</p></figcaption></figure>

{% hint style="info" %}
For the purpose of this documentation, the Log Analytics Reader role has been selected.
{% endhint %}

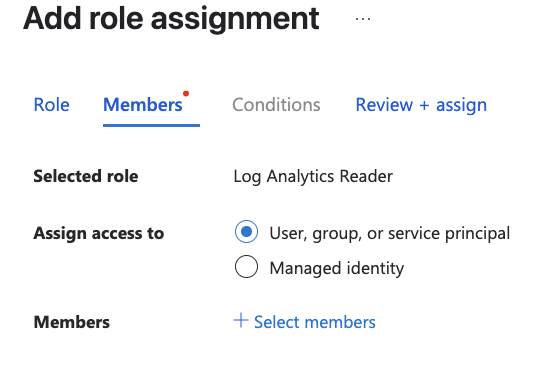
* Once you have selected your role, click "Members"
* Next to "Assign access to," select "User, group, or service principal"
* Click "Select members"

<figure><img src="/files/fgggpOPjLbOrpyFz1Wbl" alt=""><figcaption><p>Click Select members</p></figcaption></figure>

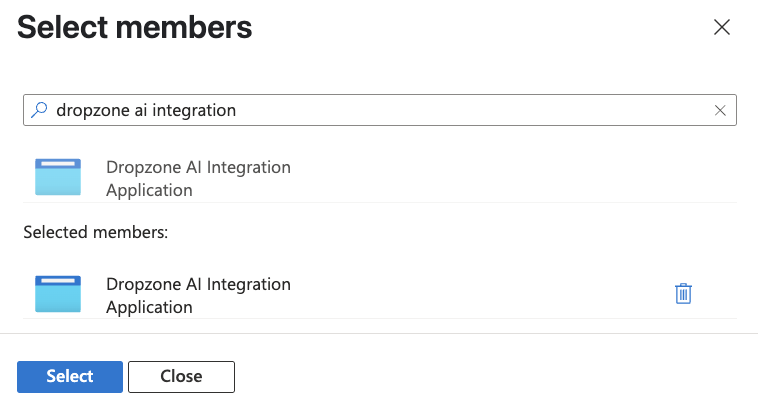
* Search for your application (such as Dropzone AI Sentinel Integration) and click "Select"

<figure><img src="/files/YMoN05jrevkVCfe0F6XY" alt=""><figcaption><p>Assign members</p></figcaption></figure>

* In the bottom left hand corner, click "Review + assign" twice

<figure><img src="/files/b9FRKrRs2rNSOo88FaCr" alt=""><figcaption><p>Click Review + assign</p></figcaption></figure>

### Workspace IDs

To obtain your Workspace Name and Workspace ID, do the following:

* Navigate to [your Azure portal](https://portal.azure.com)
* Under the "Azure Services" heading, navigate to Microsoft Sentinel

<figure><img src="/files/P5OIltBBJg5by3nLF3cc" alt=""><figcaption><p>Navigate to Microsoft Sentinel</p></figcaption></figure>

* Select the Workspace you wish to analyze

<figure><img src="/files/CI94g8EcSk2jpupwdQYV" alt=""><figcaption><p>Select your workspace</p></figcaption></figure>

* In the left sidebar, navigate to Configuration > Settings

<figure><img src="/files/rUuELoLWHKh310WXozqe" alt=""><figcaption><p>Navigate to settings</p></figcaption></figure>

* Click on "Workspace Settings"

<figure><img src="/files/s8i3MWmkqgG49GpHRbVD" alt=""><figcaption><p>Navigate to settings</p></figcaption></figure>

* Copy the Workspace ID, Subscription ID, and Resource Group shown for use later in the Dropzone UI

<figure><img src="/files/KWLIc6NYPEhdIS0KC6DI" alt=""><figcaption><p>Copy the integration details</p></figcaption></figure>

## Enable Microsoft Sentinel

To enable the Data Source integration, you will need the following information:

| Dropzone Field  | Source                                 |
| --------------- | -------------------------------------- |
| Client ID       | The Application ID copied earlier      |
| Tenant ID       | The Directory ID copied earlier        |
| Client Secret   | The Client Secret Value copied earlier |
| Workspace ID    | The Workspace ID copied earlier        |
| Subscription ID | The Subscription ID copied earlier     |
| Resource Group  | The Resource group copied earlier      |

To enable the Data Source integration, do the following:

* Navigate to your Dropzone AI tenant home page e.g. https\://*mycompany*.dropzone.app
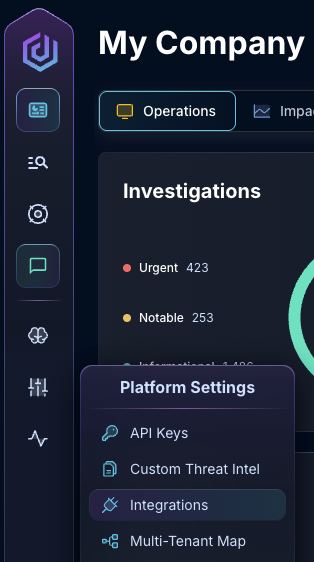
* In the bottom right corner, navigate to Settings > Integrations

<figure><img src="/files/zN02u3HObDaemUY8E1kD" alt=""><figcaption><p>Integrations Dropdown</p></figcaption></figure>

* Click "Available"

<figure><img src="/files/brI7n2Ux40Tk0jTwBCVh" alt=""><figcaption><p>Click Available</p></figcaption></figure>

* In the Search bar, search Microsoft Sentinel, then click "Configure"

<figure><img src="/files/tJDymzu1jtTXP4KMgrdy" alt=""><figcaption><p>The Microsoft Sentinel Tile</p></figcaption></figure>

* Under the Data Source heading, input the Client ID, Tenant ID, and Client Secret

<figure><img src="/files/yoOQUPzCQq3YUQUUbroI" alt=""><figcaption><p>The Microsoft Sentinel Data Integration pt 1</p></figcaption></figure>

* Under the Workspaces heading, click "Add item." Input the details of your workspace, then click "Add item" again

<figure><img src="/files/AgAwwN2WnhJUC0kgRfUR" alt=""><figcaption><p>The Microsoft Sentinel Data Integration pt 2</p></figcaption></figure>

* Click "Test & Save" to finish

If you have any errors engage your Dropzone AI support representative.


---

# Agent Instructions: Querying This Documentation

If you need additional information that is not directly available in this page, you can query the documentation dynamically by asking a question.

Perform an HTTP GET request on the current page URL with the `ask` query parameter:

```
GET https://docs.dropzone.ai/integrations/data/ms_data/mssentinel_data.md?ask=<question>
```

The question should be specific, self-contained, and written in natural language.
The response will contain a direct answer to the question and relevant excerpts and sources from the documentation.

Use this mechanism when the answer is not explicitly present in the current page, you need clarification or additional context, or you want to retrieve related documentation sections.