> For the complete documentation index, see [llms.txt](https://docs.dropzone.ai/llms.txt). Markdown versions of documentation pages are available by appending `.md` to page URLs; this page is available as [Markdown](https://docs.dropzone.ai/integrations/alert/ms_alert/mssentinel_alert.md).

# Microsoft Sentinel

## Microsoft Sentinel

{% hint style="success" %}
Microsoft Sentinel is an SIEM integration. SIEM integrations are used to perform analysis of any SIEM generated alerts, and/or to use generated data as part of investigation analysis.
{% endhint %}

The Dropzone platform integrates with the [Microsoft Sentinel](https://learn.microsoft.com/en-us/azure/sentinel/) security SIEM. Many customers ingest other alert sources into Microsoft Sentinel (e.g. IDPs) and integrate Dropzone into Microsoft Sentinel rather than the source systems.

### Integration Overview

To enable these integrations you will perform the following actions:

* Register a new application in Microsoft Entra Admin
* Locate your Client ID, Tenant ID, and create a Client Secret
* Assign necessary API permissions to the application
* Assign roles to the application in Microsoft Sentinel
* Locate your Workspace Name and Workspace ID

See the [Microsoft Integrations](/integrations/alert/ms_alert.md) page for instructions on how to register a new application, locate your Client ID and Tenant ID, and to create a Client Secret.

### Set Application Permissions

General instructions on how to assign API permissions to the application can be found in the [Microsoft Integrations](/integrations/alert/ms_alert.md) page.

Enabling MS Sentinel will require the following APIs and permissions:

| API             | Permissions               |
| --------------- | ------------------------- |
| Log Analytics   | `Data.Read`               |
| Microsoft Graph | `SecurityEvents.Read.All` |

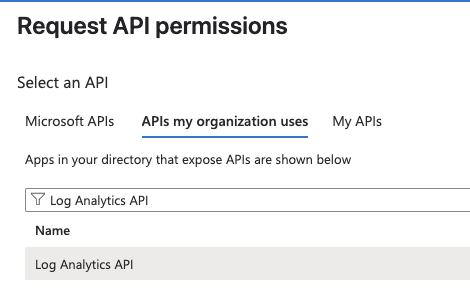
To add the Log Analytics API, do the following:

* In the API permissions page, click "Add a permission"
* Navigate to "APIs my organization uses"
* In the search bar, input "Log Analytics API," and select it

<figure><img src="/files/y0lNbvqOTCACuono7Rwu" alt=""><figcaption><p>Select Log Analytics API</p></figcaption></figure>

* Click "Application permissions"
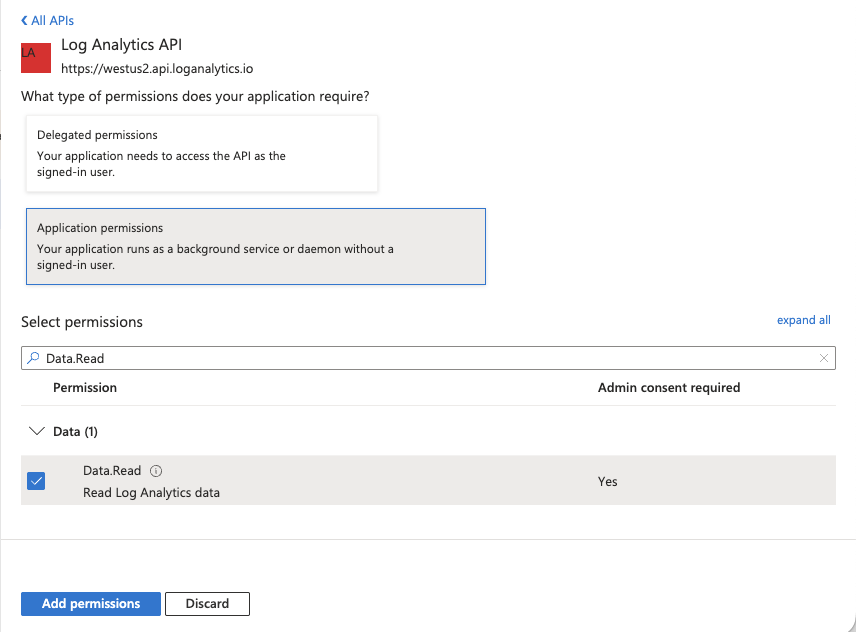
* In the search bar, input "Data.Read" and select it. Click "Add permissions"

<figure><img src="/files/QLuZAWYsOXpDpFzQgfzO" alt=""><figcaption><p>Add the Data.Read permission</p></figcaption></figure>

* Once back in the Application API permissions page, click "Grant admin consent for \[mycompany.net]"

<figure><img src="/files/nKTcgGobOtW8J851R42c" alt=""><figcaption><p>Grant admin consent</p></figcaption></figure>

* Click "Yes"

<figure><img src="/files/6t1bTqpO5FLj1cjlgnEu" alt=""><figcaption><p>Grant admin consent</p></figcaption></figure>

If your integration requires access to security alerts via Microsoft Graph, do the following:

* In the API permissions page, click "Add a permission"
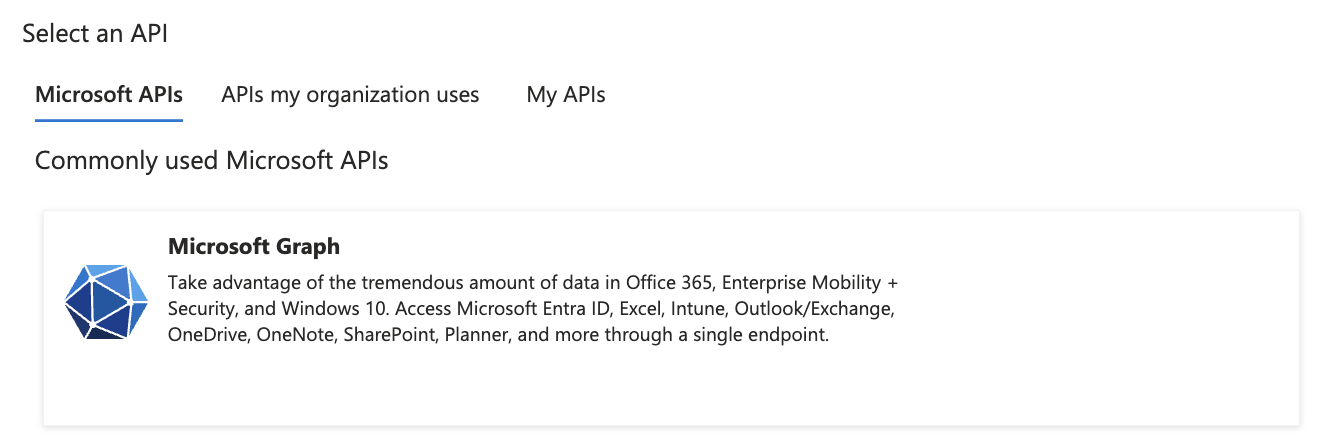
* Under the Microsoft API header, select "Microsoft Graph"

<figure><img src="/files/7ucvU7fOJt0pTZQNDMws" alt=""><figcaption><p>Select Microsoft Graph</p></figcaption></figure>

* Click "Application permissions"
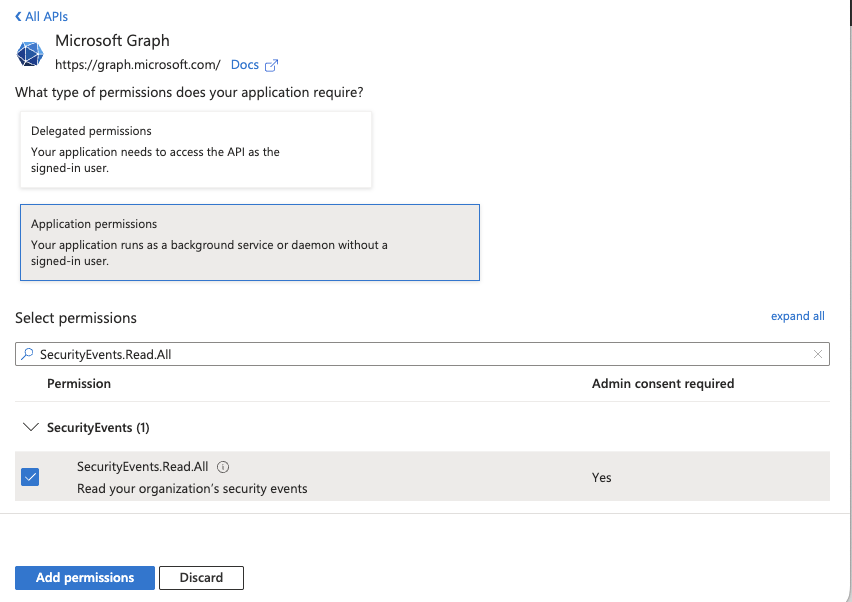
* Check the permission "SecurityEvents.Read.All," then click "Add permissions"

<figure><img src="/files/jVxcXTcAFR4E5p05pFCS" alt=""><figcaption><p>Add the SecurityEvents.Read.All permission</p></figcaption></figure>

* Once back in the Application API permissions page, click "Grant admin consent for \[mycompany.net]"

<figure><img src="/files/nKTcgGobOtW8J851R42c" alt=""><figcaption><p>Grant admin consent</p></figcaption></figure>

* Click "Yes"

<figure><img src="/files/6t1bTqpO5FLj1cjlgnEu" alt=""><figcaption><p>Grant admin consent</p></figcaption></figure>

### Assign Roles in Microsoft Sentinel

To allow the application to access Microsoft Sentinel data, you must assign the application roles based on your desired access level.

* Navigate to [your Azure portal](https://portal.azure.com)
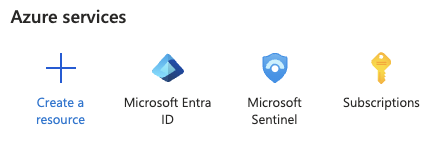
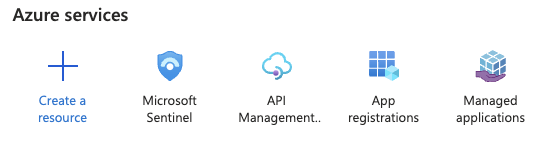
* Under the "Azure Services" heading, navigate to Microsoft Sentinel

<figure><img src="/files/KQBmhRjA7BMpTWzW7a1g" alt=""><figcaption><p>Navigate to Microsoft Sentinel</p></figcaption></figure>

* Select the Log Analytics Workspace you wish to analyze

<figure><img src="/files/CI94g8EcSk2jpupwdQYV" alt=""><figcaption><p>Select your workspace</p></figcaption></figure>

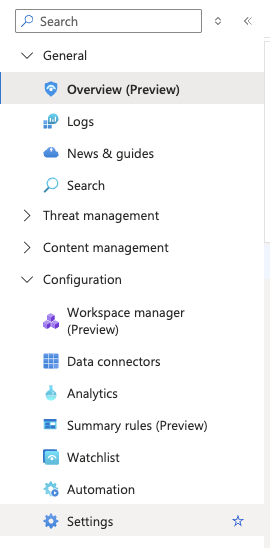
* Navigate to Configuration > Settings

<figure><img src="/files/rUuELoLWHKh310WXozqe" alt=""><figcaption><p>Navigate to Settings</p></figcaption></figure>

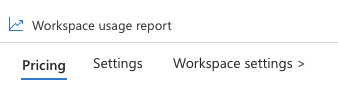
* Click on "Workspace settings"

<figure><img src="/files/s8i3MWmkqgG49GpHRbVD" alt=""><figcaption><p>Click on Workspace settings</p></figcaption></figure>

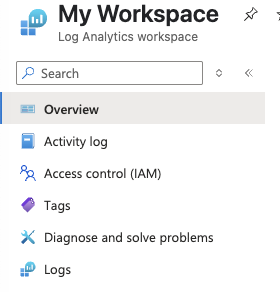
* Navigate to "Access control (IAM)"

<figure><img src="/files/2YPqtg5kekYZvCn2bRzg" alt=""><figcaption><p>Click on Access control (IAM)</p></figcaption></figure>

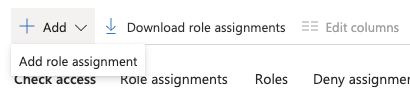
* Select Add > Add role assignment

<figure><img src="/files/ihAPqecFisIRxjncGWo8" alt=""><figcaption><p>Add a role assignment</p></figcaption></figure>

* Select a [role](https://learn.microsoft.com/en-us/azure/sentinel/roles) based on your desired access level:
  * Read-only access: Log Analytics Reader or Microsoft Sentinel Reader
  * Read and write access: Microsoft Sentinel Responder or Microsoft Sentinel Contributor

{% hint style="info" %}
If you wish to enable Ticket Sync, you must assign the application a Read and write access role.
{% endhint %}

<figure><img src="/files/9kQV6HNPCiYEW8V95rOX" alt=""><figcaption><p>Select your role</p></figcaption></figure>

{% hint style="info" %}
For the purpose of this documentation, the Log Analytics Reader role has been selected.
{% endhint %}

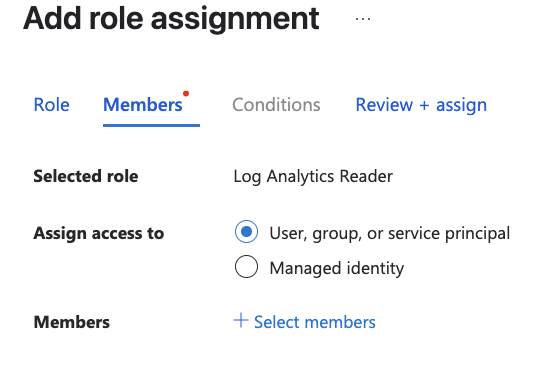
* Once you have selected your role, click "Members"
* Next to "Assign access to," select "User, group, or service principal"
* Click "Select members"

<figure><img src="/files/fgggpOPjLbOrpyFz1Wbl" alt=""><figcaption><p>Click Select members</p></figcaption></figure>

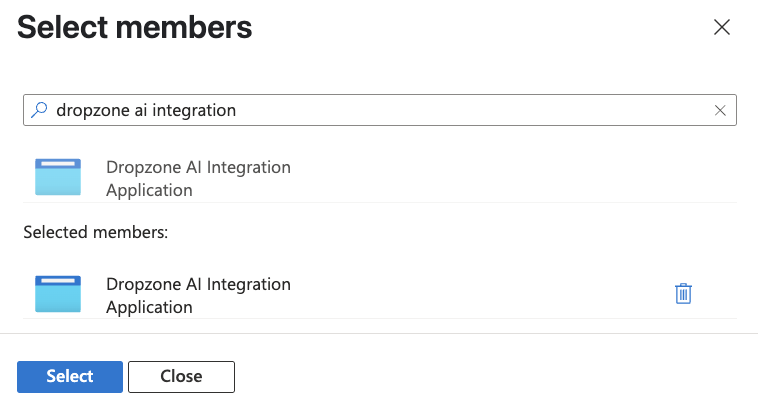
* Search for your application (such as Dropzone AI Sentinel Integration) and click "Select"

<figure><img src="/files/YMoN05jrevkVCfe0F6XY" alt=""><figcaption><p>Assign members</p></figcaption></figure>

* In the bottom left hand corner, click "Review + assign" twice

<figure><img src="/files/b9FRKrRs2rNSOo88FaCr" alt=""><figcaption><p>Click Review + assign</p></figcaption></figure>

### Workspace IDs

To obtain your Workspace Name and Workspace ID, do the following:

* Navigate to [your Azure portal](https://portal.azure.com)
* Under the "Azure Services" heading, navigate to Microsoft Sentinel

<figure><img src="/files/P5OIltBBJg5by3nLF3cc" alt=""><figcaption><p>Navigate to Microsoft Sentinel</p></figcaption></figure>

* Select the Workspace you wish to analyze

<figure><img src="/files/CI94g8EcSk2jpupwdQYV" alt=""><figcaption><p>Select your workspace</p></figcaption></figure>

* In the left sidebar, navigate to Configuration > Settings

<figure><img src="/files/rUuELoLWHKh310WXozqe" alt=""><figcaption><p>Navigate to settings</p></figcaption></figure>

* Click on "Workspace Settings"

<figure><img src="/files/s8i3MWmkqgG49GpHRbVD" alt=""><figcaption><p>Navigate to settings</p></figcaption></figure>

* Copy the Workspace ID, Subscription ID, and Resource Group shown for use later in the Dropzone UI

<figure><img src="/files/KWLIc6NYPEhdIS0KC6DI" alt=""><figcaption><p>Copy the integration details</p></figcaption></figure>

## Enable Microsoft Sentinel

To enable the Alert Source integration, you will need the following information:

| Dropzone Field  | Source                                 |
| --------------- | -------------------------------------- |
| Client ID       | The Application ID copied earlier      |
| Tenant ID       | The Directory ID copied earlier        |
| Client Secret   | The Client Secret Value copied earlier |
| Workspace ID    | The Workspace ID copied earlier        |
| Subscription ID | The Subscription ID copied earlier     |
| Resource Group  | The Resource group copied earlier      |

To enable the Alert Source integration, do the following:

* Navigate to your Dropzone AI tenant home page e.g. https\://*mycompany*.dropzone.app
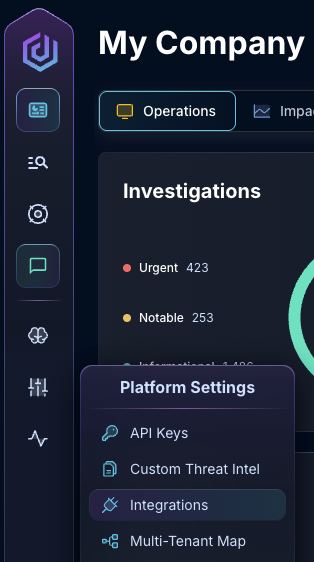
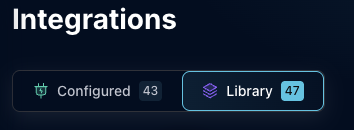
* In the bottom right corner, navigate to Settings > Integrations

<figure><img src="/files/zN02u3HObDaemUY8E1kD" alt=""><figcaption><p>Integrations Dropdown</p></figcaption></figure>

* Click "Available"

<figure><img src="/files/brI7n2Ux40Tk0jTwBCVh" alt=""><figcaption><p>Click Available</p></figcaption></figure>

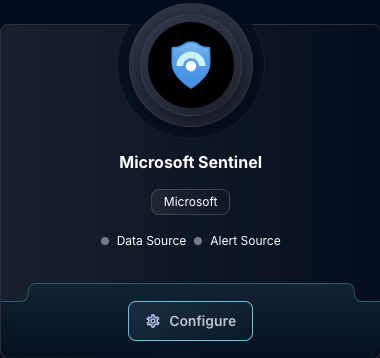
* In the Search bar, search Microsoft Sentinel, then click "Configure"

<figure><img src="/files/tJDymzu1jtTXP4KMgrdy" alt=""><figcaption><p>The Microsoft Sentinel Tile</p></figcaption></figure>

* Under the Alert Source heading, input the Client ID, Tenant ID, and Client Secret

<figure><img src="/files/wANaEfXLZmf5xVdoVgco" alt=""><figcaption><p>The Microsoft Sentinel Alert configuration (pt 1)</p></figcaption></figure>

* Under the Workspaces heading, click "Add item." Input the details of your workspace, then click "Add item" again

<figure><img src="/files/cIcUDouyxgXz19FgwEoS" alt=""><figcaption><p>The Microsoft Sentinel Alert configuration (pt 2)</p></figcaption></figure>

* Under the heading "Enabled severity levels," check the boxes for each incident severity level you want Dropzone to ingest alerts for
* Under the heading "Enabled statuses," check the box for each incident status you want Dropzone to investigate alerts for

<figure><img src="/files/ObCI11lXuysa5NeA3kHL" alt=""><figcaption><p>The Microsoft Sentinel Alert configuration (pt 3)</p></figcaption></figure>

* If you wish, you may add [KQL](https://learn.microsoft.com/en-us/kusto/query/?view=microsoft-fabric) queries to investigate. To do so, click "Add Item" under the KQL Queries heading, then input the Query. Click "Add item" again when done

<figure><img src="/files/YqkZQLfXQgndgiqo7v1k" alt=""><figcaption><p>The Microsoft Sentinel Alert configuration (pt 4)</p></figcaption></figure>

* If you wish, you may adjust your ticket sync settings. To do so, under the "Ticket Sync — Update Ticket Status" header, check the box labeled "Update status on investigation change"

{% hint style="info" %}
Dropzone has several stages to its investigation process: Start, Completed/In Review, Reviewed, and Reopened. During those stages, Dropzone can write updates to the Sentinel ticket status. Shown below is a reasonable default.
{% endhint %}

<figure><img src="/files/HWLAhZmrUD9yhTqmHq2o" alt=""><figcaption><p>The Microsoft Sentinel Alert configuration (pt 5)</p></figcaption></figure>

* If you want Dropzone to be able to investigate email alerts, check the box under the heading "Microsoft Defender Email Fetching"

<figure><img src="/files/AplzS39VQvH6FYTVTy4f" alt=""><figcaption><p>The Microsoft Sentinel Alert configuration (pt 6)</p></figcaption></figure>

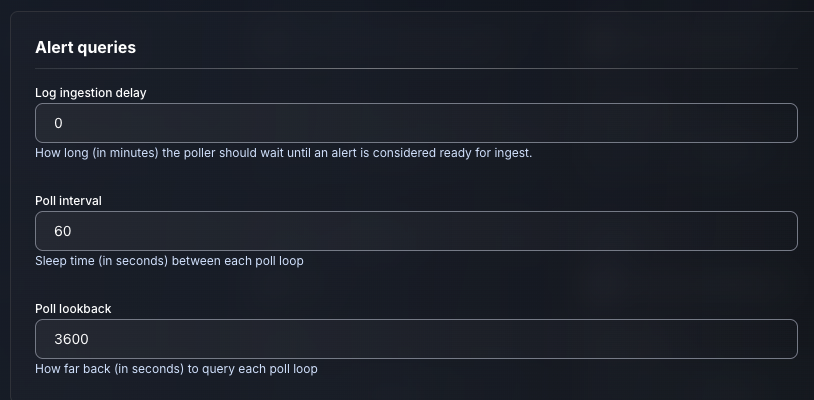
* Input your desired log ingestion delay, poll interval and poll lookback

<figure><img src="/files/2qn1FRWfM87n9ApeByn9" alt=""><figcaption><p>The Microsoft Sentinel Alert configuration (pt 7)</p></figcaption></figure>

* If you wish for Dropzone to update the ticket status over the course of the investigation, check the box labeled "Update ticket status on investigation change," then select the status parameters

<figure><img src="/files/gMRliNdBlYHelrX4x04y" alt=""><figcaption><p>The Microsoft Sentinel Alert configuration (pt 8)</p></figcaption></figure>

* If you wish to further filter alerts using the Python [CEL](https://python-common-expression-language.readthedocs.io/en/stable/tutorials/cel-language-basics/) package, check the box labeled "Use advanced filtering"
* Input your CEL expression, then select whether to include or exclude alerts matching that filter. Add each filter individually using the "Add Item" button
* Contact your Dropzone AI support representative for more information about this feature

<figure><img src="/files/infLIQONnAkvK8XGXOi4" alt=""><figcaption><p>Click "Test &#x26; Save" to finish</p></figcaption></figure>

* Click "Test & Save" to finish

If you have any errors engage your Dropzone AI support representative.