> For the complete documentation index, see [llms.txt](https://docs.dropzone.ai/llms.txt). Markdown versions of documentation pages are available by appending `.md` to page URLs; this page is available as [Markdown](https://docs.dropzone.ai/integrations/alert/googlesecops_alert.md).

# Google Security Operations

{% hint style="info" %}
Google Security Operations is a SIEM integration. SIEM integrations are used to perform analysis of any SIEM generated alerts, and/or to use generated data as part of investigation analysis. They are optional, but enabling more integrations enhances Dropzone analysis.
{% endhint %}

Dropzone integrates with [Google Security Operations](https://cloud.google.com/security/products/security-operations) to investigate different security alerts across many of Google's security products.

## Integration Overview

To enable these integrations you will perform the following actions:

* Identify your service account address
* Grant IAM access to the Dropzone service account
* Obtain your Google Account Details
* Complete Google Cloud Mapping
* Enable the Alert and Data sources

Alternatively, Dropzone also supports [Service Account Impersonation](https://docs.cloud.google.com/iam/docs/service-account-impersonation) as a method of authentication. This allows an already-authenticated principal to temporarily act as a target service account and use its permissions, often by requesting short-lived credentials instead of downloading long-lived keys. See Google Cloud's [documentation](https://docs.cloud.google.com/docs/authentication/use-service-account-impersonation) for further information.

{% hint style="info" %}
If you choose to use Service Account Impersonation, be sure to grant (or ask your administrator to grant) the principal you're using the [Service Account Token Creator](https://docs.cloud.google.com/iam/docs/roles-permissions/iam#iam.serviceAccountTokenCreator) role.
{% endhint %}

## Identify your service account email address

To obtain the email address of your Dropzone service account, do the following:

* Navigate to your Dropzone AI tenant home page e.g. https\://*mycompany*.dropzone.app
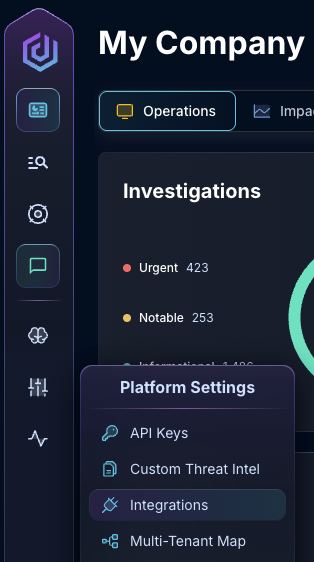
* In the bottom left hand corner, navigate to Settings > Integrations

<figure><img src="/files/zN02u3HObDaemUY8E1kD" alt=""><figcaption><p>Integrations Dropdown</p></figcaption></figure>

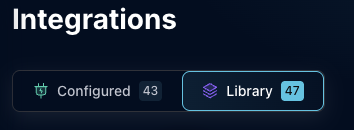
* Click "Library"

{% hint style="info" %}
If you have previously integrated this application, click "Configured"
{% endhint %}

<figure><img src="/files/QySQeLXXUC5SLjaXyamH" alt=""><figcaption><p>Click Library</p></figcaption></figure>

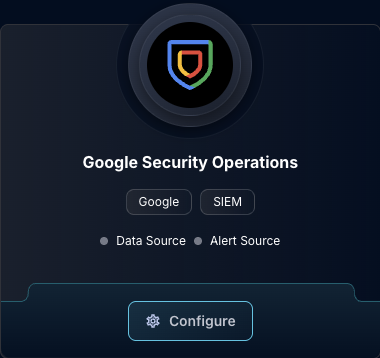
* In the Search bar, search Google Security Operations, then click "Configure"

<figure><img src="/files/7KI64qtojWxIco9PVALt" alt=""><figcaption><p>The Google SecOps Tile</p></figcaption></figure>

* Copy the "SERVICE ACCOUNT EMAIL" field for use in the Google Console interface

<figure><img src="/files/zoqV89980XI4lPCjAj8a" alt="" width="320"><figcaption><p>Copy the service account email</p></figcaption></figure>

## Grant IAM Access to Dropzone AI

* Navigate to the Google Console page of the project your SecOps instance is in
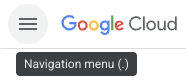
* In the upper left hand corner, open the navigation menu

<figure><img src="/files/MZxgKryMsfjPIGg0PrmC" alt=""><figcaption><p>Open the navigation menu</p></figcaption></figure>

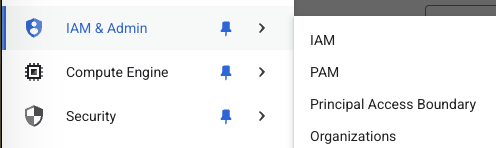
* Navigate to IAM & Admin > IAM

<figure><img src="/files/yuJsgHqdiasRnCFoCv7i" alt=""><figcaption><p>Navigate to IAM</p></figcaption></figure>

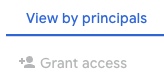
* Under "View by principals," click "Grant Access"

{% hint style="info" %}
To be able to complete this step, you will need the `resourcemanager.projects.setIamPolicy` permission.
{% endhint %}

<figure><img src="/files/7nUYn0CIHkWERBDtlwEx" alt=""><figcaption><p>Click "Grant Access"</p></figcaption></figure>

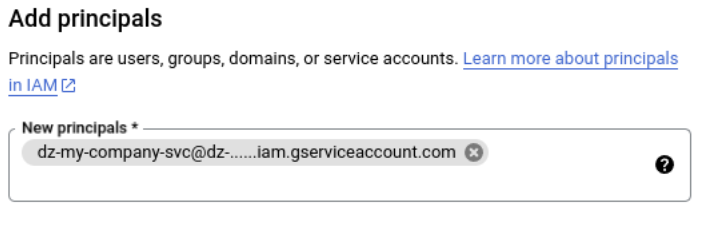
* Under "New principals," input the email address you copied earlier from the Dropzone UI "SERVICE ACCOUNT EMAIL"

<figure><img src="/files/JlwJAp89wkRDp0lTR5Px" alt=""><figcaption><p>Input the email address from the Dropzone UI Service Account Email</p></figcaption></figure>

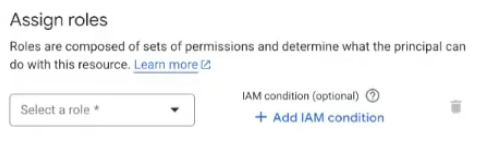
* Click "Select a role"

<figure><img src="/files/Dm12Cp9FGA3Wzs3J2cxi" alt=""><figcaption><p>Click "Select a role"</p></figcaption></figure>

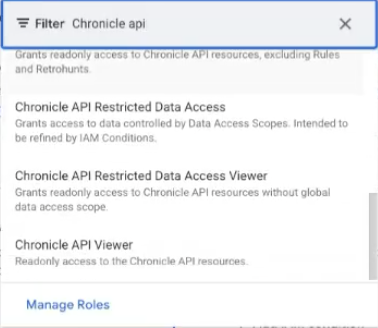
* Search the "[Chronicle API Viewer](https://docs.cloud.google.com/iam/docs/roles-permissions/chronicle#chronicle.viewer)" role, then click it

{% hint style="info" %}
If you want Dropzone to be able to edit Cases/Alerts after investigation (e.g. by changing stages, modifying priority, or adding comments) select the Chronicle API Editor role.
{% endhint %}

<figure><img src="/files/mrdamGFcavSuQNlU2BeV" alt=""><figcaption><p>Assign the Chronicle API Viewer role</p></figcaption></figure>

* Click "Save"

<figure><img src="/files/dU5laYUIPdTCDfv7cQAS" alt=""><figcaption><p>Click "Save"</p></figcaption></figure>

## Obtain Account Details

To obtain your Instance Name, do the following:

* Return to the Google Console page of the project your SecOps instance is in
* In the upper left hand corner, open the navigation menu

<figure><img src="/files/MZxgKryMsfjPIGg0PrmC" alt=""><figcaption><p>Open the navigation menu</p></figcaption></figure>

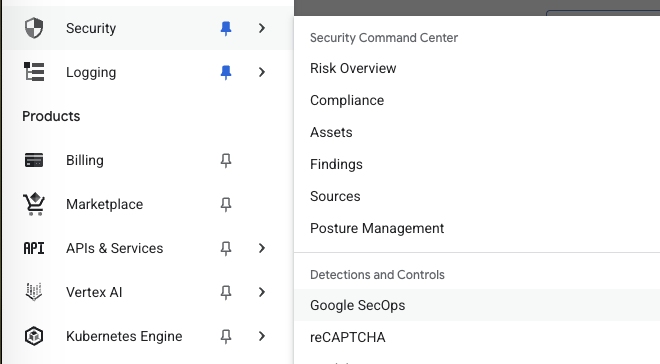
* Navigate to Security > Detection and Controls > Google SecOps

<figure><img src="/files/EmPtS8BzJwrtWZnJJt2S" alt=""><figcaption><p>Navigate to Google SecOps</p></figcaption></figure>

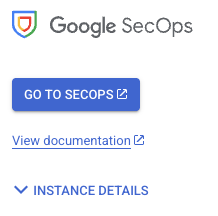
* In the Google SecOps page, click the carrot next to "Instance Details"

<figure><img src="/files/C38x9OwvTLi4WagL0qGS" alt=""><figcaption><p>Reveal the Instance Details</p></figcaption></figure>

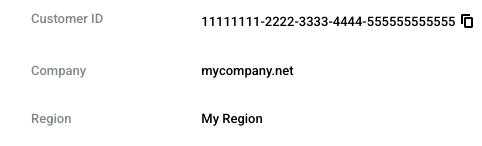
* Copy the Customer ID shown for use later in the Dropzone UI where it is called "Instance Name"

<figure><img src="/files/2LazT7IOChRmSPYeKTta" alt=""><figcaption><p>Copy the Instance Name</p></figcaption></figure>

To obtain your Project ID, do the following:

* In the upper left, click on the project icon

<figure><img src="/files/dXEF8882EAY40hffTpC9" alt=""><figcaption><p>Click the project icon</p></figcaption></figure>

* Using the search bar, locate the project your SecOps instance is in
* Under "ID," copy the ID value shown for use later in the Dropzone UI where it is called "Project ID"

<figure><img src="/files/GUYyeX9rnIkWFapXg0jG" alt=""><figcaption><p>Copy the Project ID</p></figcaption></figure>

## Cloud Identity Mapping

If you want Dropzone to be able to have SOAR access, (e.g. managing [cases](https://cloud.google.com/chronicle/docs/soar/investigate/working-with-cases/cases-overview)), you must map the service account to your platform's access control parameters. This will provide the service account with access to SOC Roles and Environments required to perform automated tasks or API operations.

To do Cloud Identity mapping, do the following:

* As an admin, log into your Google SecOps instance
* In the left sidebar, navigate to Settings > SOAR Settings
* Navigate to Advanced > Group Mapping
* Click "+ Add"
* In the IDP/User group field, enter the full service account email address or the workload identity principle string
* Assign the service account the appropriate [SOC role and Environments](https://docs.cloud.google.com/chronicle/docs/soar/admin-tasks/advanced/control-access-to-platform)

{% hint style="success" %}
Dropzone needs read access to all security event data and case/alert content in your tenant, plus the ability to comment on, tag, and change the status of cases and alerts it has been given for investigation.
{% endhint %}

* Click "Save"

## Enable Google SecOps

To enable the Alert Source integration, you will need the following information:

| Dropzone Field                 | Source                                                          |
| ------------------------------ | --------------------------------------------------------------- |
| Instance Name                  | The "Customer ID" value you copied earlier                      |
| Project ID                     | The "Project ID" value you copied earlier                       |
| Customer-Owned Service Account | The email of the service account Dropzone will be impersonating |

{% hint style="info" %}
The Customer-Owned Service Account is only necessary if you wish to use Service Account Impersonation as your authentication method.
{% endhint %}

To enable the Alert Source integration, do the following:

* Navigate to your Dropzone AI tenant home page e.g. https\://*mycompany*.dropzone.app
* In the bottom left hand corner, navigate to Settings > Integrations

<figure><img src="/files/zN02u3HObDaemUY8E1kD" alt=""><figcaption><p>Integrations Dropdown</p></figcaption></figure>

* Click "Library"

{% hint style="info" %}
If you have previously integrated this application, click "Configured"
{% endhint %}

<figure><img src="/files/QySQeLXXUC5SLjaXyamH" alt=""><figcaption><p>Click Library</p></figcaption></figure>

* In the Search bar, search Google Security Operations, then click "Configure"

<figure><img src="/files/7KI64qtojWxIco9PVALt" alt=""><figcaption><p>The Google Security Operations Tile</p></figcaption></figure>

* Under the Alert Source heading, input the Instance Name and Project ID
* If you are using Service Account Impersonation, input the Customer-Owned Service Account value

<figure><img src="/files/16MoW8lNWYTiX9gvJxMV" alt=""><figcaption><p>The Google SecOps Alert Source Configuration (pt 1)</p></figcaption></figure>

* To enable Dropzone to investigate [alerts](https://cloud.google.com/chronicle/docs/investigation/investigate-alert), check the box labeled "Enable alerts." If you wish to enable Dropzone to filter by priority, check the box labeled "Enable priority filtering," then check the priority levels you wish for Dropzone to ingest

<figure><img src="/files/2ZMmuvJ4QnQd17eqPoop" alt=""><figcaption><p>The Google SecOps Alert Source Configuration (pt 2)</p></figcaption></figure>

* To enable Dropzone to investigate [cases](https://cloud.google.com/chronicle/docs/soar/investigate/working-with-cases/cases-overview), check the box labeled "Enable cases"
* Input your SOAR API Key and SOAR Instance Hostname
* Check the box labeled "Include Closed Cases" to include closed cases in Dropzone investigations

<figure><img src="/files/GESy8Zsat1HRecJ1OsB4" alt=""><figcaption><p>The Google SecOps Alert Source Configuration (pt 3)</p></figcaption></figure>

* If you wish to only include certain [stages](https://cloud.google.com/chronicle/docs/soar/investigate/working-with-cases/what-actions-can-you-take-on-a-case) in Dropzone investigation, check the box labeled "Enabled stage filtering," then check the stages you wish for Dropzone to ingest

<figure><img src="/files/Yox6hAjm4j6AiXnXZXmU" alt=""><figcaption><p>The Google SecOps Alert Source Configuration (pt 5)</p></figcaption></figure>

* If you wish to enable priority filtering, check the box labeled "Enable priority filtering," then check the priority levels you wish for Dropzone to ingest

<figure><img src="/files/XRGSh0YMz5mj622kLXnN" alt=""><figcaption><p>The Google SecOps Alert Source Configuration (pt 6)</p></figcaption></figure>

* If you wish to enable filtering by case [title](https://docs.cloud.google.com/chronicle/docs/soar/investigate/working-with-cases/whats-on-the-cases-screen#:~:text=Case%20queue%20header%3F-,Case,-top%20bar%20%2D%20left), check the box labeled "Enable case title filtering," then click "Add Item"
* Input case titles individually by clicking "Add Item" for each one
* Under "Filter Mode," select whether to include or exclude the cases matching the filters

<figure><img src="/files/dzPoPiYcWzY1GMksjOGk" alt=""><figcaption><p>The Google SecOps Alert Source Configuration (pt 7)</p></figcaption></figure>

* If you wish to enrich Dropzone investigation with [CrowdStrike Recon](https://www.youtube.com/watch?v=0PjOLMuLIrA) information, check the box labeled "Enable case enrichment options," then check the box labeled "Fetch Crowdstrike Recon notifications"

<figure><img src="/files/lBXOeac2x37hXLhQsmUB" alt=""><figcaption><p>The Google SecOps Alert Source Configuration (pt 8)</p></figcaption></figure>

* Input your desired Poll interval and lookback

<figure><img src="/files/OgHRdfu7kIUCDy2SncMj" alt=""><figcaption><p>The Google SecOps Alert Source Configuration (pt 9)</p></figcaption></figure>

* If you wish to further filter alerts using the Python [CEL](https://python-common-expression-language.readthedocs.io/en/stable/tutorials/cel-language-basics/) package, check the box labeled "Use advanced filtering"
* Input your CEL expression, then select whether to include or exclude alerts matching that filter. Add each filter individually using the "Add Item" button
* Contact your Dropzone AI support representative for more information about this feature

<figure><img src="/files/b6KSgzFkKKaK5o0L50aF" alt=""><figcaption><p>Click "Test &#x26; Save" to finish</p></figcaption></figure>

If you have any errors, engage your Dropzone AI support representative.