# Signing in with Microsoft Entra

{% hint style="success" %}
This document details configuring Microsoft Entra ID SAML for authentication with Dropzone. This is more advanced than using federated buttons such as "Log in with Google" and "Log in with Microsoft" but offers more customization, especially useful for customers with more than one Dropzone environment.
{% endhint %}

Enabling SAML with Microsoft Entra ID involves the following steps:

* Creating Dropzone Role Groups in Microsoft Entra ID
* Assigning users to Dropzone Role Groups
* Creating the SAML application in Microsoft Entra ID
* Assigning Users to the Dropzone Application
* Providing your SAML IDP details to your Dropzone support representative
* Updating your SAML application with details from your Dropzone support representative

{% hint style="info" %}
There are multiple ways you can configure Microsoft Entra ID successfully with Dropzone AI; we show a group-based version here because it maps cleanly to Entra claim conditions.

As long as the values come down where we expect them, in the correct form, the "how" is up to you.
{% endhint %}

## Create Dropzone Role Groups

Dropzone needs to know which role a user should receive when logging into your tenant. In Microsoft Entra ID, the simplest way to do this is to create one group for each Dropzone role.

To create a role group, do the following:

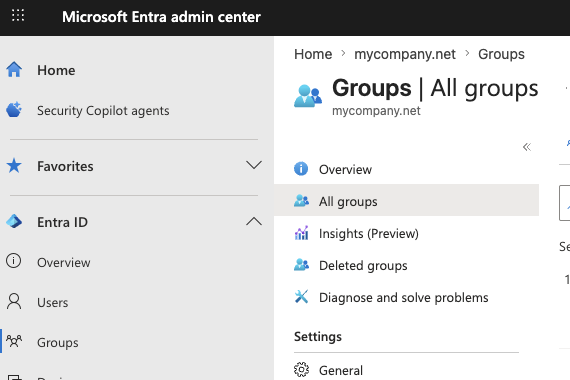
* As an admin, in your Microsoft Entra ID [homepage](https://entra.microsoft.com/#home), navigate to Groups > All Groups

<figure><img src="/files/s3UtRLwKajib5lFPGaCx" alt=""><figcaption><p>Click All Groups</p></figcaption></figure>

* Click "New Group"

<figure><img src="/files/jWoUwrZcpRmbrM3CN0t8" alt=""><figcaption></figcaption></figure>

Create groups for the Dropzone [roles](https://docs.dropzone.ai/dropzone-101/getting-started/roles-and-permissions) you plan to use. For each group, do the following:

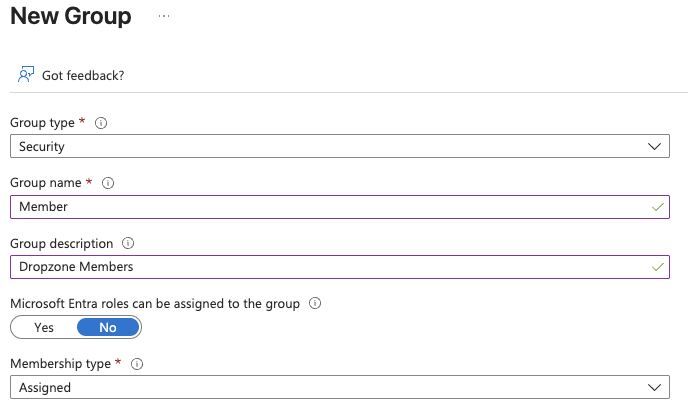
* Under "Group Type," select "Security"
* Under "Group Name," name the group one of the following Role Names:

| Group Purpose                 | Dropzone Role Value    | Role Name            | Permissions                                                                                              |
| ----------------------------- | ---------------------- | -------------------- | -------------------------------------------------------------------------------------------------------- |
| Administrators                | `admin`                | Admin                | Full write access; create and update integration configuration; create response automation; manage users |
| Members                       | `member`               | Member               | Minimal write access; create context memory, add investigation feedback; ask questions of the AI         |
| Restricted Access - Read Only | `restricted-read-only` | Restricted Read Only | Read-only access; view investigations and dashboards; no ad-hoc chat                                     |

* Under "Membership Type," select "Assigned"

<figure><img src="/files/5PCRhP7zf5HT5ziRZe3x" alt=""><figcaption><p>For the purpose of this documentation, the "Member" group is displayed</p></figcaption></figure>

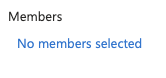
* Under "Members," click "No members selected"
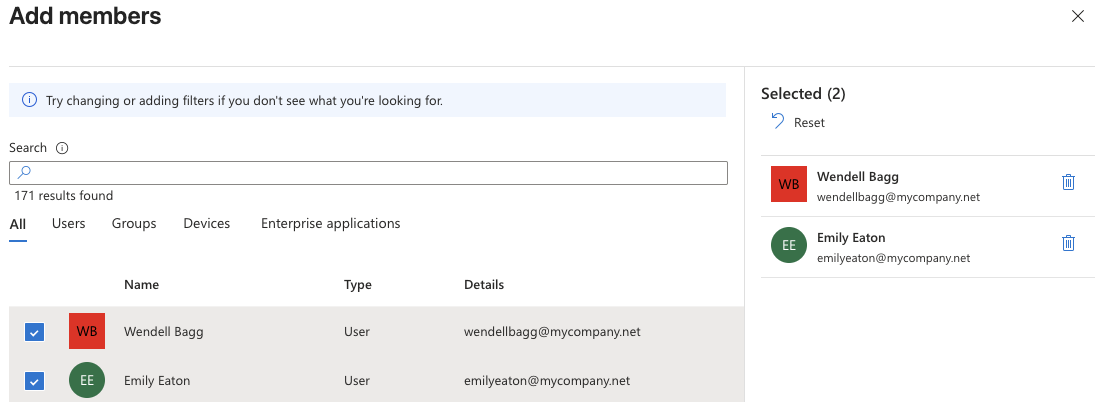
* Add the users you want to receive this role, then click "Select"

{% hint style="warning" %}
Each Dropzone user should be assigned to exactly one Dropzone role group. If a user matches multiple claim conditions, Microsoft Entra ID evaluates the matching conditions in order, which can produce unexpected role assignments.
{% endhint %}

<figure><img src="/files/PvKdm2HBepc6XgqQdCJW" alt=""><figcaption></figcaption></figure>

* Click "Create"

## Create the Microsoft Entra Application

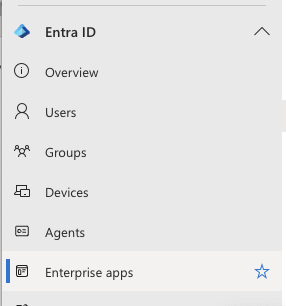
* In your Microsoft Entra ID [homepage](https://entra.microsoft.com/#home), click "Enterprise Apps"

<figure><img src="/files/J7fxE681Su1eWRehwQVY" alt=""><figcaption></figcaption></figure>

* Click "New application"

<figure><img src="/files/aFnc90Z22qbFRIBUS1Ka" alt=""><figcaption></figcaption></figure>

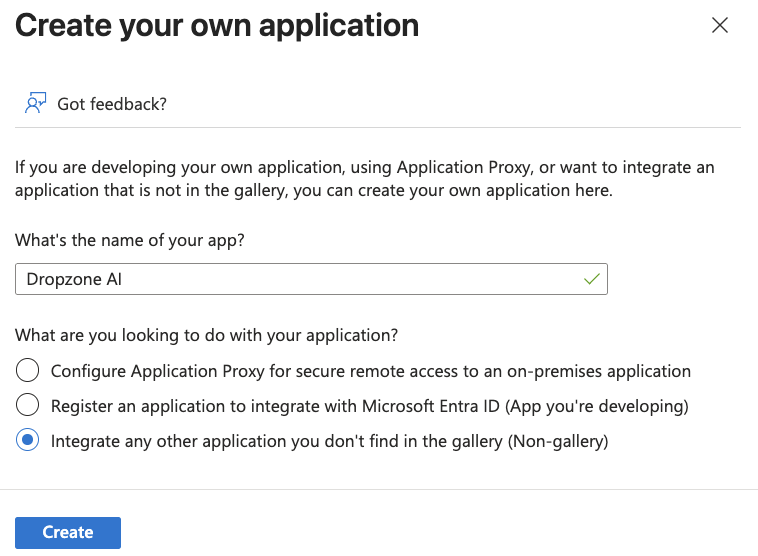
* Click "Create your own application"

<figure><img src="/files/3eLQ2ZZPfkZmAapslsgd" alt=""><figcaption></figcaption></figure>

* Name the application something memorable, such as Dropzone AI
* Select "Integrate any other application you don't find in the gallery"
* Click "Create"

<figure><img src="/files/HPiNwfgYwcrIpJ5nVmU2" alt=""><figcaption><p>Create the application</p></figcaption></figure>

{% hint style="warning" %}
Dropzone AI does not support IDP-initiated login flows, so launching Dropzone directly from the Microsoft My Apps tile may not function properly.
{% endhint %}

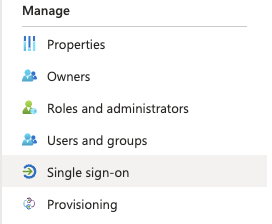
* In the newly created application, navigate to Manage > Single sign-on

<figure><img src="/files/BAmlyEgviykIgAA1xkAT" alt=""><figcaption><p>Click Single sign-on</p></figcaption></figure>

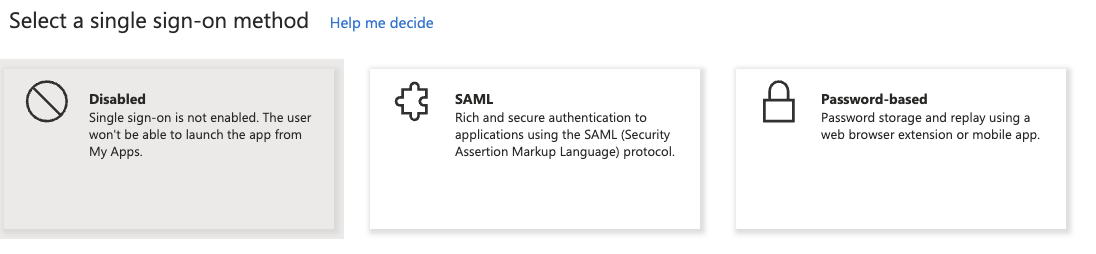
* Select SAML

<figure><img src="/files/oQzF3ypxO5siKrGHXTyY" alt=""><figcaption></figcaption></figure>

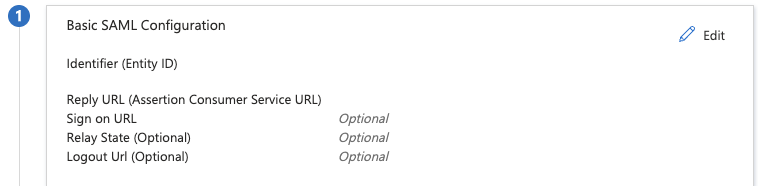
* Click the Edit button in the "Basic SAML Configuration" section

<figure><img src="/files/mKoi5pVqMZX6xaqCCL3e" alt=""><figcaption></figcaption></figure>

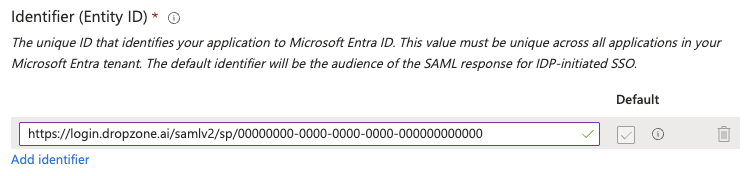
* Under "Identifier (Entity ID)," click "Add identifier" and input your Dropzone SAMl Entity ID

{% hint style="info" %}
If you have not received a SAML Entity ID from Dropzone, enter a placeholder of \_<https://login.dropzone.ai/samlv2/sp/00000000-0000-0000-0000-000000000000\\>\_
{% endhint %}

<figure><img src="/files/iCTCcMnG4O1nolrza8Fa" alt=""><figcaption><p>Input your Dropzone SAML Entity ID</p></figcaption></figure>

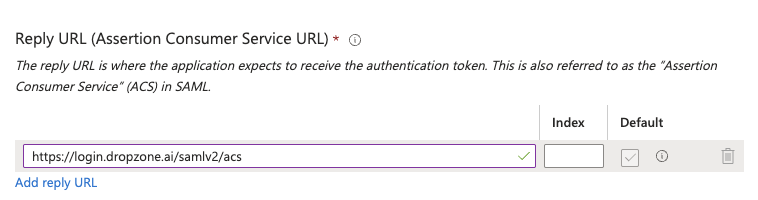
* Under "Reply URL (Assertion Consumer Service URL)," click "Add reply URL" and input your Dropzone SAML ACS URL

{% hint style="info" %}
Likely, this value is \_<https://login.dropzone.ai/samlv2/acs\\>\_. If you have not received a SAML ACS URL from Dropzone, contact your Dropzone support representative.
{% endhint %}

<figure><img src="/files/7fAdeS2f1KSmnFIbacuv" alt=""><figcaption><p>Input your Dropzone SAML ACS URL</p></figcaption></figure>

* Leave the other values blank
* Click "Save" when done, then exit the window

<figure><img src="/files/tak8HOizzKfFZXahOu8k" alt=""><figcaption></figcaption></figure>

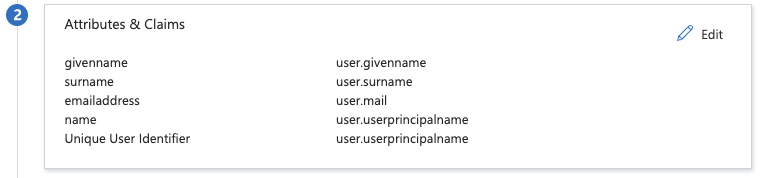
* Click the Edit button in the "Attributes and Claims" section

<figure><img src="/files/aMHPQTFDtY5qTZTwBBRo" alt=""><figcaption><p>Edit Attributes and Claims</p></figcaption></figure>

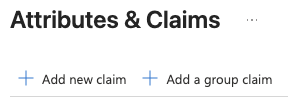
* Click "Add new claim"

<figure><img src="/files/UO2BlMT3hxUNtR6qUlcM" alt=""><figcaption></figcaption></figure>

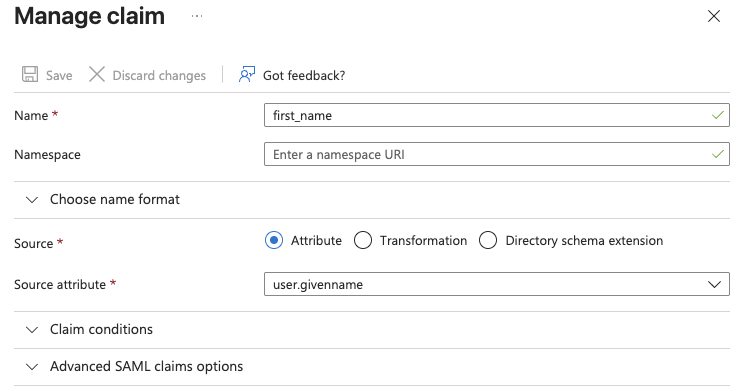
* Create claims with the following attributes, then click "Save"

| Name           | Namespace   | Source Attribute           |
| -------------- | ----------- | -------------------------- |
| first\_name    | Leave blank | user.givenname             |
| last\_name     | Leave blank | user.surname               |
| full\_name     | Leave Blank | user.displayname           |
| dropzone\_role | Leave Blank | See below for instructions |

<figure><img src="/files/OF0evexXDCDa0iiUqXEy" alt=""><figcaption><p>For the purpose of this documentation, the first_name claim has been shown</p></figcaption></figure>

### Configure the `dropzone_role` Claim

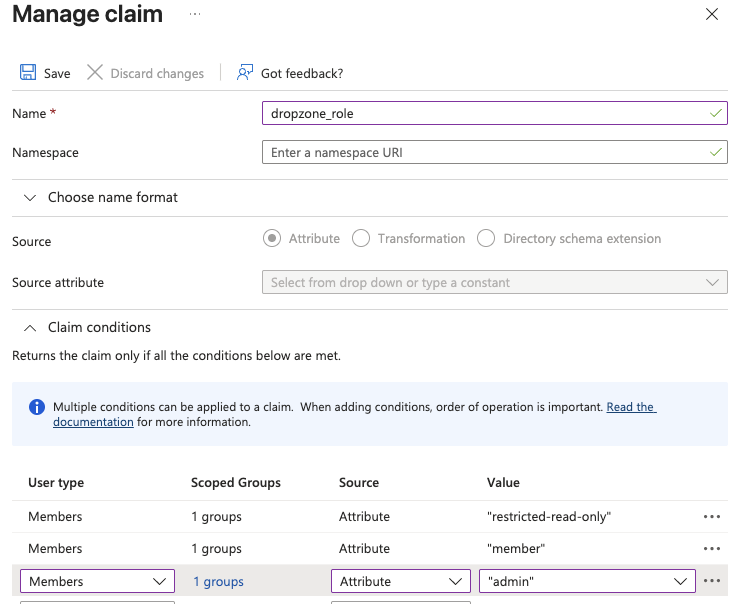
In your Entra Enterprise Application, the `dropzone_role` claim should use claim conditions to return the correct Dropzone role value based on group membership.

* Name the claim "dropzone\_role"
* Leave the Namespace section blank
* Click "Claim Conditions"
* Add a claim condition for each Dropzone role group you created earlier

{% hint style="warning" %}
Microsoft Entra ID evaluates claim conditions in order. If a user matches more than one condition, the condition order can affect which \`dropzone\_role\` value is returned.

Make sure to add the conditions in the order shown below and assign each user to exactly one Dropzone role group to avoid unexpected role assignments.
{% endhint %}

| User Type | Scoped Groups                 | Source    | Value                |
| --------- | ----------------------------- | --------- | -------------------- |
| Members   | Dropzone Restricted Read Only | Attribute | restricted-read-only |
| Members   | Dropzone Members              | Attribute | member               |
| Members   | Dropzone Admins               | Attribute | admin                |

{% hint style="info" %}
The Scoped Group names shown above are examples. Select the Entra groups that correspond to your Dropzone roles.
{% endhint %}

<figure><img src="/files/7Dy1Ozy4LczVaVxt8xrw" alt=""><figcaption><p>Configure the `dropzone_role` claim</p></figcaption></figure>

* Click "Save" when done

## Assign Users to the Dropzone Application

* In your Microsoft Entra ID [homepage](https://entra.microsoft.com/#home), click "Enterprise Apps" and find the application you just created
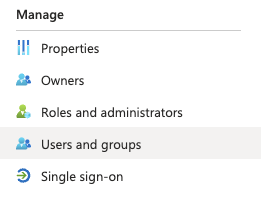
* Navigate to Manage > Users and Groups

<figure><img src="/files/fZBq3363WPHWWy2pLicX" alt=""><figcaption></figcaption></figure>

* Click "Add user/group"

<figure><img src="/files/TQBiAPxwLDZEJeqKD0u3" alt=""><figcaption></figcaption></figure>

* Click "Users and groups"

<figure><img src="/files/ku1ze2wu9wCZoPtnR1JY" alt=""><figcaption></figcaption></figure>

* Add the users and groups you want to have access, then click "Assign"

## Configure with Dropzone

* Navigate back to the application
* Navigate to Managers > Single-sign on
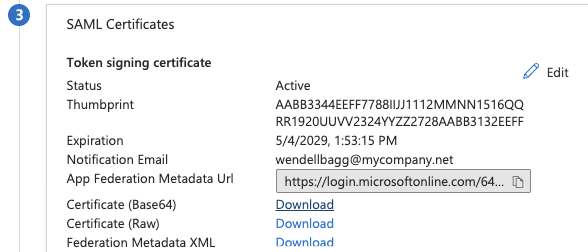
* In the "SAML Certificates" section, next to "Certificate (Base64)," click "Download"

<figure><img src="/files/0s5isdUh7FRokPEEpNIO" alt=""><figcaption></figcaption></figure>

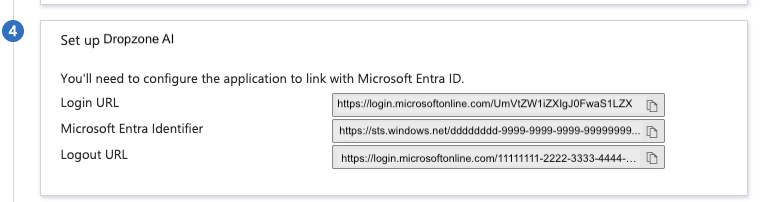
* In the "Set Up" section, copy the login URL and Microsoft Entra Identifier

<figure><img src="/files/ntmfXmyn8h6VU8XmyOFL" alt=""><figcaption></figcaption></figure>

Send the following values to your Dropzone support representative:

| Microsoft Entra ID Value   | Send to Dropzone  |
| -------------------------- | ----------------- |
| Login URL                  | IDP SSO URL       |
| Microsoft Entra Identifier | IDP Entity ID     |
| Certificate (Base64)       | X.509 Certificate |

### Update Your SAML Application

Once you have provided this information to Dropzone (if we have not already), Dropzone will enable SAML and provide you two values to add to the "Basic SAML Configuration" section of your SAML app.

* Navigate back to your Enterprise Application
* Navigate to Manage > Single sign-on
* In the Basic SAMl Configuration section, click "Edit" and input the following:
  * ACS URL - paste this into the "Reply URL (Assertion Consumer Service URL)" field
  * Entity ID - paste this into the "Identifier (Entity ID)" field
* Click "Save"

{% hint style="info" %}
Only proceed with this step if you did not receive an ACS URL or Entity ID to begin with.
{% endhint %}

## Advanced Microsoft Entra ID

Microsoft Entra ID has multiple ways to manage group membership and claim values. You may use dynamic groups, existing access groups, or other identity governance workflows if they produce the expected `dropzone_role` SAML claim.

{% hint style="warning" %}
This section is here as a reference, not a requirement. Use whatever method you're most comfortable with that balances your administration duties and meets your security standards.
{% endhint %}

The values `admin`, `member`, and `restricted-read-only` must match exactly the values we expect, however the groups can be anything that matches your internal naming standards.

If you have any errors or questions, engage your Dropzone AI support representative.


---

# Agent Instructions: Querying This Documentation

If you need additional information that is not directly available in this page, you can query the documentation dynamically by asking a question.

Perform an HTTP GET request on the current page URL with the `ask` query parameter:

```
GET https://docs.dropzone.ai/dropzone-101/getting-started/accessing-tenants/managing-users/microsoft-entra-saml.md?ask=<question>
```

The question should be specific, self-contained, and written in natural language.
The response will contain a direct answer to the question and relevant excerpts and sources from the documentation.

Use this mechanism when the answer is not explicitly present in the current page, you need clarification or additional context, or you want to retrieve related documentation sections.